サーバプロラボ・網元しめ鯖屋、新装開店!! 超短期レンタル、試用販売も対応可能!!
|
|
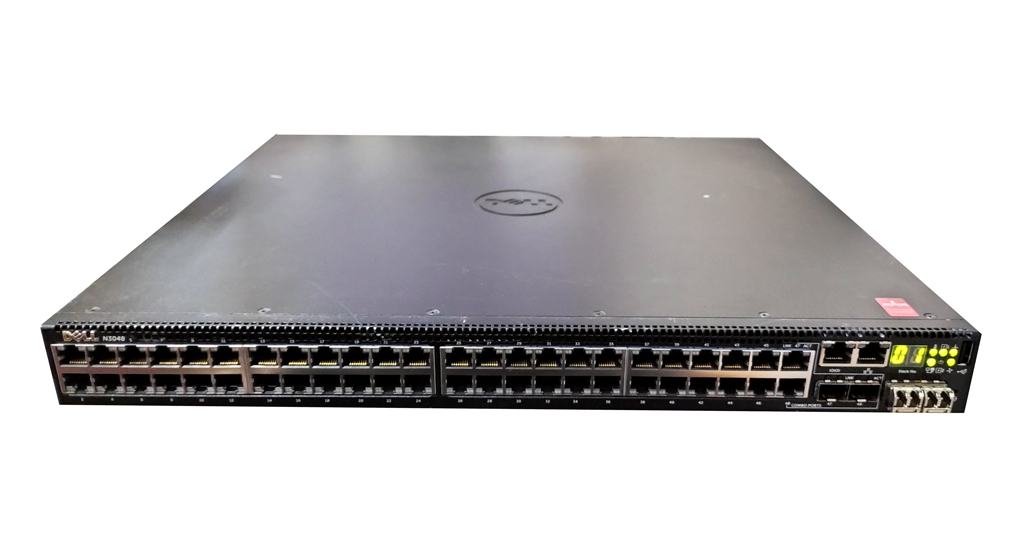
Dell Networking N3048です。 メーカーサイトによる仕様は以下の通りです。 N3048: RJ45 10/100/1000 Mb 自動認識ポート x48、 SFP+ ポート x2、 GbE コンボメディアポート x 2、 ホットスワップ拡張モジュールベイ x 1、 200W 内蔵電源ユニット x 1 設定情報の消去を行い、起動確認をしています。 全ての機能の動作確認をしているわけではありませんので、その点、ご了承願います。 以下が起動ログです。 U-Boot SPL 2012.10-00078-g24e99ea (Jun 24 2014 - 16:41:18) BENCH SCREENING TEST1 ========================================= IPROC_XGPLL_CTRL_3: 0x15400000 IPROC_XGPLL_STATUS: 0x80000212 DCO code: 33 PASS ========================================= HWRev: 0x25 AVS: 0x0 VOUT Init: 0x64 VOUT Set: 0x64 DEV ID= 0000dc14 SKU ID = 0x0 DDR type: DDR3 MEMC 0 DDR speed = 800MHz ddr_init2: Calling soc_ddr40_set_shmoo_dram_config ddr_init2: Calling soc_ddr40_phy_calibrate C01. Check Power Up Reset_Bar C02. Config and Release PLL from reset C03. Poll PLL Lock C04. Calibrate ZQ (ddr40_phy_calib_zq) C05. DDR PHY VTT On (Virtual VTT setup) DISABLE all Virtual VTT C06. DDR40_PHY_DDR3_MISC C07. VDL Calibration C07.1 C07.2 C07.4 C07.4.1 C07.4.4 VDL calibration result: 0x30000003 (cal_steps = 0) C07.4.5 C07.4.6 C07.5 C08. DDR40_PHY_DDR3_MISC : Start DDR40_PHY_RDLY_ODT.... C09. Start ddr40_phy_autoidle_on (MEM_SYS_PARAM_PHY_AUTO_IDLE) .... C10. Wait for Phy Ready Programming controller register ddr_init2: Calling soc_ddr40_shmoo_ctl Validate Shmoo parameters stored in flash ..... OK Press Ctrl-C to run Shmoo ..... skipped Restoring Shmoo parameters from flash ..... done Running simple memory test ..... OK DDR Tune Completed Micron MT29F2G08ABAEA, 128 KiB blocks, 2 KiB pages, 16B OOB, 8-bit NAND: chipsize 256 MiB U-Boot 2012.10-00078-g24e99ea (Jun 24 2014 - 16:41:18) DRAM: 1 GiB WARNING: Caches not enabled NAND: Micron MT29F2G08ABAEA, 128 KiB blocks, 2 KiB pages, 16B OOB, 8-bit NAND: chipsize 256 MiB In: serial Out: serial Err: serial arm_clk=1000MHz, axi_clk=499MHz, apb_clk=124MHz, arm_periph_clk=500MHz Net: Registering eth Broadcom BCM IPROC Ethernet driver 0.1 Using GMAC0 (0x18022000) et0: ethHw_chipAttach: Chip ID: 0xdc14; phyaddr: 0x1 serdes_reset_core pbyaddr(0x1) id2(0xf) bcmiproc_eth-0 boot in 3 s Creating 1 MTD partitions on "nand0": 0x000000200000-0x00000f000000 : "mtd=4" Loading file ’/image2’ to addr 0x70000000 with size 22124042 (0x0151960a)... Done ## Booting kernel from Legacy Image at 70000074 ... Image Name: System for iproc_pct Image Type: ARM Linux Multi-File Image (gzip compressed) Data Size: 22123862 Bytes = 21.1 MiB Load Address: 61008000 Entry Point: 61008000 Contents: Image 0: 2523553 Bytes = 2.4 MiB Image 1: 1782876 Bytes = 1.7 MiB Image 2: 474 Bytes = 474 Bytes Image 3: 17816934 Bytes = 17 MiB Verifying Checksum ... OK ## Loading init Ramdisk from multi component Legacy Image at 70000074 ... Uncompressing Multi-File Image ... OK boot_prep_linux commandline: console=ttyS0,9600 maxcpus=2 mem=1024M root=/dev/ram mtdparts=nand_iproc.0:1024k(nboot),512k(nenv),256k(vpd),256k(shmoo),243712k(fs),16384k(diags) ubi.mtd=fs ethaddr=f8:b1:56:87:f0:43 quiet Starting kernel ... starting pid 884, tty ’’: ’/etc/init.d/rcS’ starting pid 1014, tty ’/dev/ttyS0’: ’/etc/rc.d/rc.fastpath’ Mounting /dev/mtdblock4 at /mnt/fastpath...done. Mounting tmpfs at /mnt/application...done. Checking for USB Device... done. No USB Device found! Dell Networking Boot Options ============================ Select a menu option within 3 seconds or the Operational Code will start automatically... 1 - Start Operational Code 2 - Display Boot Menu Select (1, 2)# Extracting Operational Code from .stk file...done. Loading Operational Code...done. Decompressing Operational Code...done. Uncompressing apps.lzma SyncDB Running... DMA pool size: 16777216 AXI unit 0: Dev 0xb340, Rev 0x01, Chip BCM56340_A0, Driver BCM56340_A0 SOC unit 0 attached to PCI device BCM56340_A0 <186> Jan 10 09:48:08 0.0.0.0-1 General[fp_main_task]: bootos.c(195) 7 %% Event(0xaaaaaaaa) started! <185> Jan 10 09:48:08 0.0.0.0-1 SIM[Cnfgr_Thread ]: sim_util.c(3792) 8 %% Switch was reset due to power disruption. (Unit 1 - Waiting to select management unit)> Applying Global configuration, please wait ... Welcome to Dell Easy Setup Wizard The setup wizard guides you through the initial switch configuration, and gets you up and running as quickly as possible. You can skip the setup wizard, and enter CLI mode to manually configure the switch. You must respond to the next question to run the setup wizard within 60 seconds, otherwise the system will continue with normal operation using the default system configuration. Note: You can exit the setup wizard at any point by entering [ctrl+z]. Would you like to run the setup wizard (you must answer this question within 60 seconds)? (y/n) No data within sixty seconds!!! Thank you for using the Dell Easy Setup Wizard. You will now enter CLI mode. Applying Interface configuration, please wait ... console>
| contact us | sitemap | list Copyright 2006-2024 『網元しめ鯖屋 本館』・Retech Co.ltd. All rights reserved.
<テキスト・画像の無断転載、引用はお断りします> |
||||||||||||||||||||||||||||||


 Dell Networking N3048 48ポート L3 GbEスイッチ

